3 Low Impact Moves for Noticeable Results
Looking for a bit more tone and muscular engagement but not looking for high intensity or even dynamic movement at the moment?
- Maybe you're nursing a chronic injury?
- Or did a snowboarder take out your knee this past winter while skiing? (I'm a boarder so I can say that;)
- Or an annoying lower back issue that screeches at you when you move too quickly or land too hard?
- Maybe you just want to slow down the precision of your movements to build stability and awareness within the body?
Low impact does not have to yield low results. Here are 3 low impact movements for noticeable results:
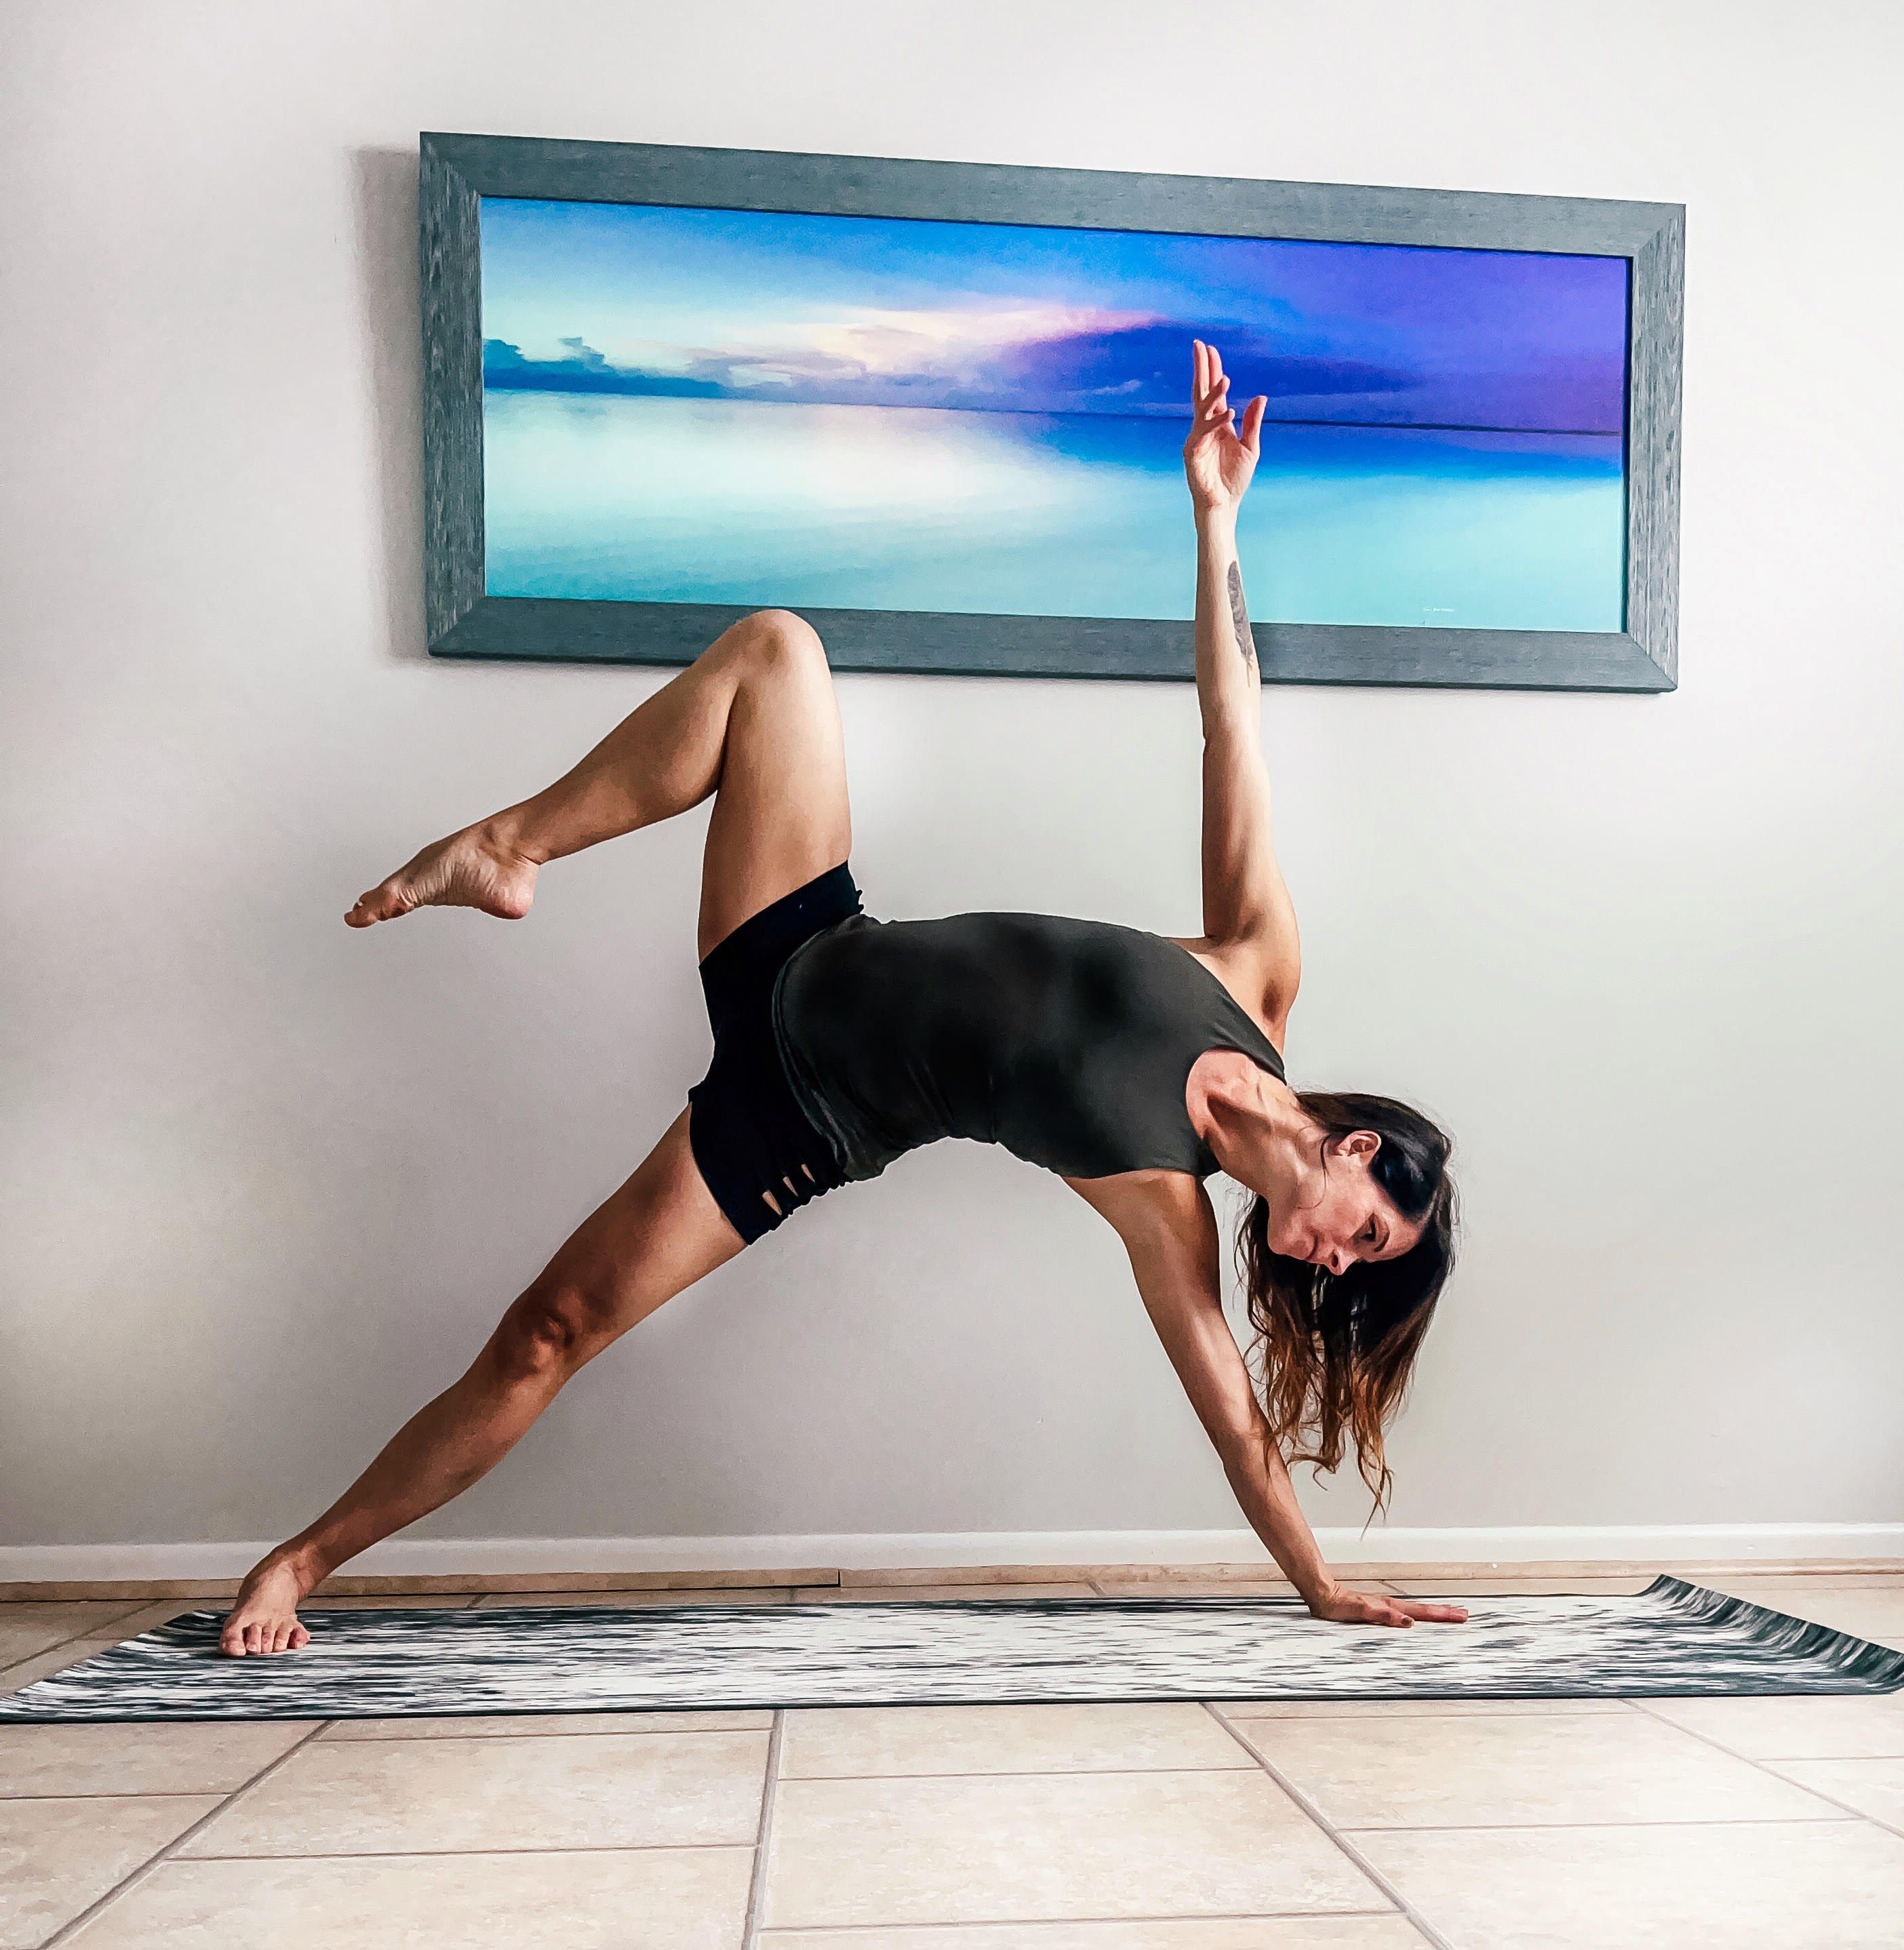
1. THE HOVER: Obliques and Shoulders
Setup: Mindfully make your way into right side plank. Your right hand should be on the earth firmly planted (especially that inner triad of index finger, thumb, and the meaty part of the base of the thumb). Make sure the right hand is slightly further away from your feet than your right shoulder. Start by either stacking your left foot on top of your right or letting it rest on the earth slightly in front of the right foot (toes pointing to the side wall along with the belly). Place your left hand on the left hip or extend the left arm towards the sky.
Low Impact Movement:
- Begin by HUGGING your right obliques into the midline and press the right hand down and slightly forward to create an ARCH in the right side of the body away from the earth.
- Then, pressing firmly into the ground with the right outer foot and right hand, begin to HOVER the left leg off the right.
- Keep pressing down with your right hand, right foot, and hugging the right side of the body up as you slowly bend the left leg and lift the left knee as if you could REACH it up to the sky.
- As you do this, look down at your right hand and begin to ROLL onto your right toes (right heel slowly lifts). As you roll your chest forward, HUG the left knee tight towards the left armpit slowly stepping the left foot to the front of the mat. WITHOUT PUTTING YOUR LEFT HAND ONTO THE EARTH!
Don't worry if the first time you try this you only make it half-way forward. This movement relies HEAVILY on core and shoulder stabilization. The KEY is to gather the energy up to the right side of the body essentially BOWING the right side of the body up and in and then PRESSING the right foot and hand away from each other during the movement. As you end up with that left foot forward you also want to end up in a bit of a COW spine. Drop the right knee down and take any version of low lunge that feels yummy.
Gentler version: Come into side plank with the right knee down on the earth and the left leg extended to the back edge of the mat. Your hips should be open to the side wall and your left hand either on the hip or arm extended to the sky. Everything remains similar for the right hand and arm to the initial version. You can work the same oblique and BOWING movement as you try to LIFT the left leg and then bend the left knee and reach it up to the sky! Now look down and SUPER HONEY SLOW, step the left foot to the front of the mat, parallel to the right hand. The only tricky part to this version is that you'll have to spin a bit on your right knee so be careful if that's your problem area.
Extra Zinger: Want to try it with the top leg straight as you step the foot forward? Everything else stays the same except you will need to HOLLOW OUT the belly even more and PRESS into the earth even more with the bottom hand.
(Don't forget the other side.)
2. THE TRIPLE WHAMMY: Quadriceps, Outer Hips, and Glutes
Setup: This one beings in standing Mountain Pose (Tadasana) with hands pressing together at heart center. With your right leg as the base, slowly transfer the weight to the right foot and bring your left knee into your chest. Keep the spine long and energy expending up. (TIP - keep your left foot either flexed, pointed, or flointed (foot pointed/toes flexed), no loose left ankles!)
Find one lucky spot to focus on with your vision and begin to hinge the upper body forward as you extend the left leg straight back hehind you, making your way into Warrior 3. Hips should remain an even distance from the earth. To help this action, HUG your outer hips into the midline and feel as iff the hips were LIFTING off of the right base leg. (There should be a LIGHTNESS to Warrior 3 as if the hips were a cloud hovering above the right femur bone.) Spine and left leg are parallel to the floor, and belly is drawn slightly in and to protect the lower back.
Low Impact Movement:
- Without lifting the upper body, begin to BEND into the right and left leg and draw the left knee behind the right knee in a low squat. The lower you go, the harder it gets, so start small and then go deeper as you feel ready.
- Now here's the tough part: begin to straighten into both legs and HUG the outer hips (especially the right hip) into midline so it doesn't pop out and get sassy to the right side of your mat.
- Press back up into Warrior 3 with the left leg extended behind you and the left foot active. (3 ankle options listed above).
- Repeat this squat 3-5 more times until you can just barely lift to Warrior 3.
- Then set the left foot to meet the right and shake out those legs like the tender meat could fall off the bone.

Gentler version: This one begins the same in standing Mountain pose (Tasadana) with hands pressing together at heart center. Again, with your right leg as the base, slowly transfer the weight to the right foot and bring your left knee into your chest. Keep the spine long and energy expending up. (TIP - keep your left food either flexed, pointed, or flointed (foot pointed/toes flexed), no loose left ankles!)
Find one lucky spot to focus on with your vision. Now begin to hinge slightly forward, but instead of transitioning through Warrior 3, bend into both knees and tuck the left knee behind the right, thereby SKIPPING the Warrior 3 portion of the movement. Now as you slowly straighten into the right leg, immediately bring the left knee back into the chest and stand up. Repeat 3-5 times and switch legs. Don't forget the shake in between.
Extra Zinger: Add all 3 together! Standing left knee to chest, W3, low squat with left knee behind right (maybe you squat so low the left knee even touches the ground), lift back through W3, and then lift the left knee back to the chest. Repeat 5 times. SHAKE vigorously!
(Don't forget the other side).
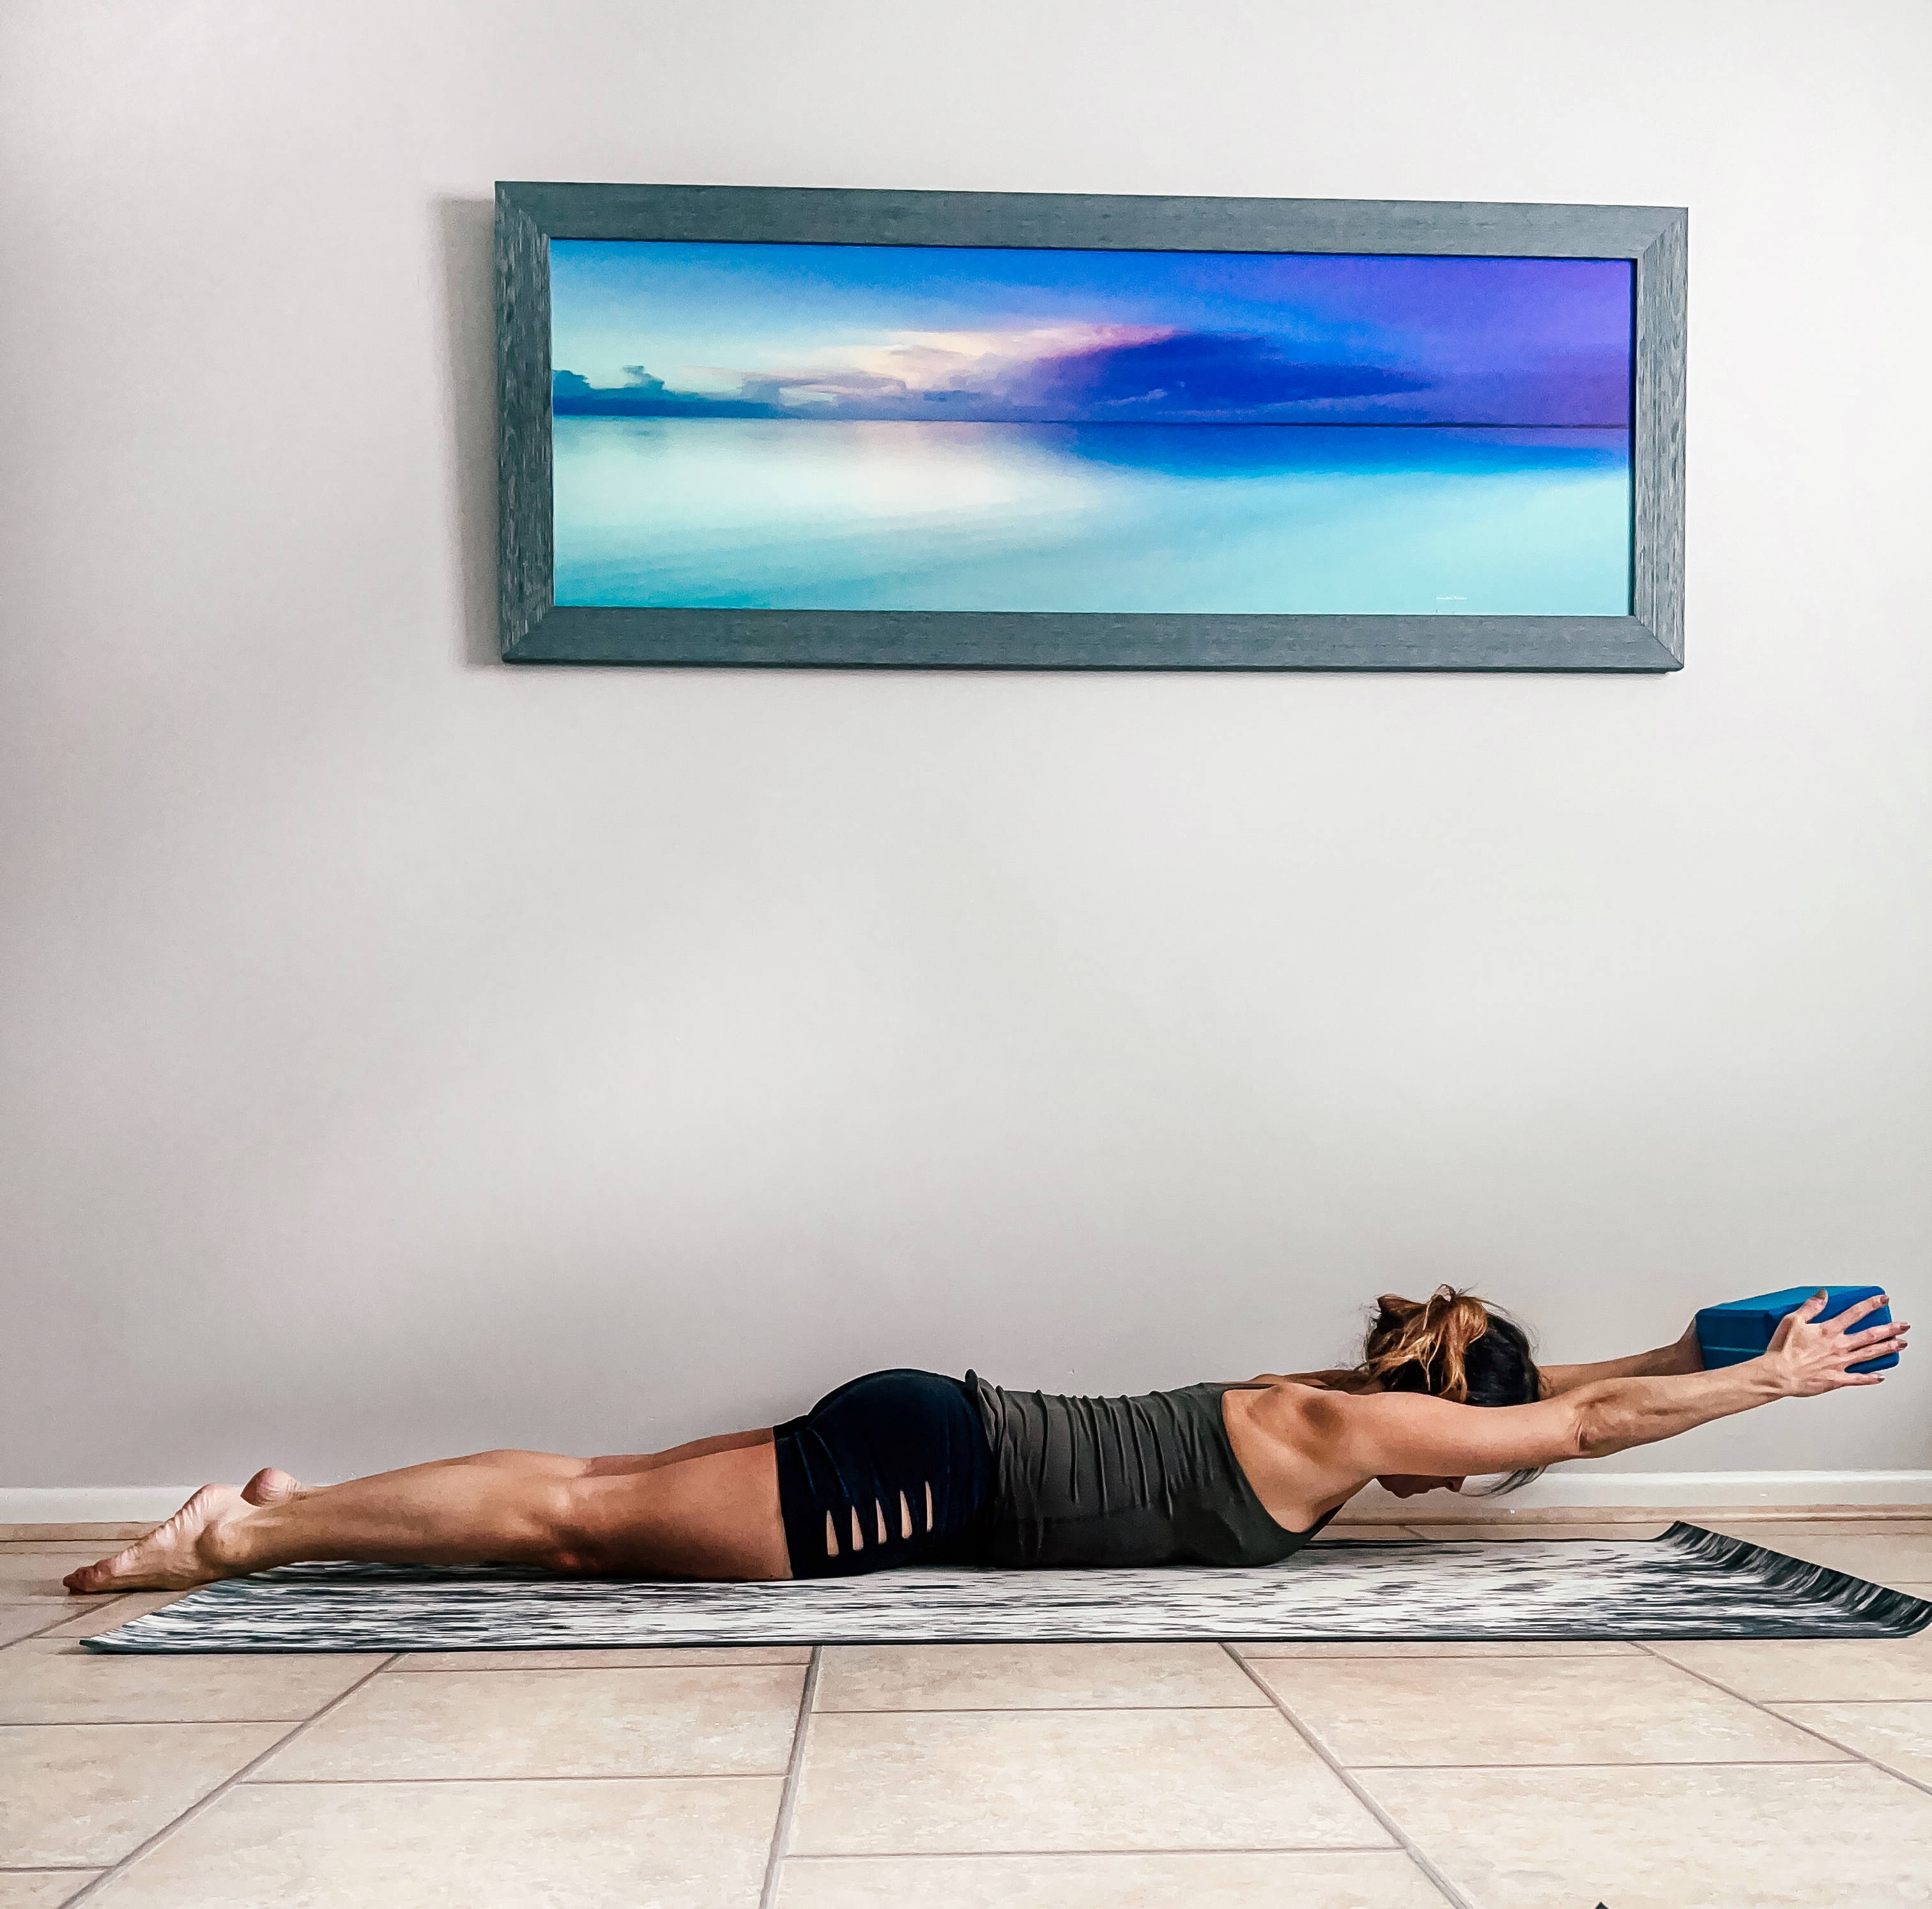
3. JALAPENO SHOULDERS: Shoulders and Spine
Setup: Lying prone (lie face down on your belly) with a block at the front of the mat. Extend your arms straight in front of you and turn the palms so they are facing one another. Bring your ATTENTION to your lower belly and feel it draw in towards the spine. Imagine your tail bone extending long toward your heels. Legs should be hips distance apart and parallel to one another with the tops of the feet on the earth and heels the same distance apart as the toes. (A.k.a. make sure the heels do not fall in towards each other). Another way to say this is to keep the front of the thighs INTERNALLY rotating towards one another.
Low Impact Movement:
- With arms remaining extended, take the block between your palms (recommend widest width of the block). No cheating and gripping with the fingers underneath the block to hold it off the ground! The only thing that should be keeping the block from falling is the pressure of your hands on both sides pinning it in space.
- Now INHALE and lift the heart slightly forward and off the ground to peel the upper body up (try not to lift your chin forward so you can keep the back of the neck LONG).
- As you do this, SQUEEZE the block with your hands as you lift it slightly higher.
- On the exhale, transfer the block to hold it with your left hand and slowly sweep your left arm wide to the left and around your back - block still in hand. Your upper chest will naturally drop back down to the earth slightly on the exhale and sweeping movement.
- Let your right hand meet the left behind the back and SQUEEZE the block between the two hands as you inhale and lift the block and chest.
- As you exhale, transfer the block into the right hand, hold it tight, and sweep the right arm around and forward. Let the left hand meet the right hand (arms extended) back in front of you.
- Repeat 3-5 times. KEY - keep the lower belly engaged and drawing in. Keep the tops of the feet pressing into the earth for stability and follow the natural breath cycle.
Switch directions and repeat.
Gentler Version: Start with a foam versus a cork block. Begin the exact same way lying prone on the belly with arms extended forward.However, instead of squeezing the block to lift and and simultaneously lifting the chest as you inhale, just transfer the block to the left hand and let your chest stay on the ground. Sweep the left arm behind the back and rest the block on your lower back or butt. Sweep your right arm behind you to grab the block and then with the same sweeping motion, bring your right arm forward to meet the left. Transfer the block between hands, right to left and continue this sequence 3-5 times.
Switch Directions (start with block in the right hand forward) and repeat.
Extra Zinger: Everything stays the same as the initial version except you ADD and extra breath during the SQUEEZE of the block portion of the movement. Inhale squeeze block in front of you and lift, hold for exhale, inhale lift block and chest higher, then exhale and sweep the left arm behind the back. Repeat behind the back. Start over and repeat 3-5 times.
Switch Directions and repeat.
Adding these 3 low impact movements, the Hover, the Triple Whammy and Jalapeño Shoulders, to your weekly routine will provide noticeable results in just a few weeks.
The Hover takes time, so be patient.
The Triple Whammy tests persistence, so enjoy the simmer of frustration as you wobble.
Jalapeño Shoulders will quickly turn from a simmer to a burn, so good luck and enjoy the heat! ;)
Much love,
Liz