Five Simple Steps to Mastering Shiva Pose
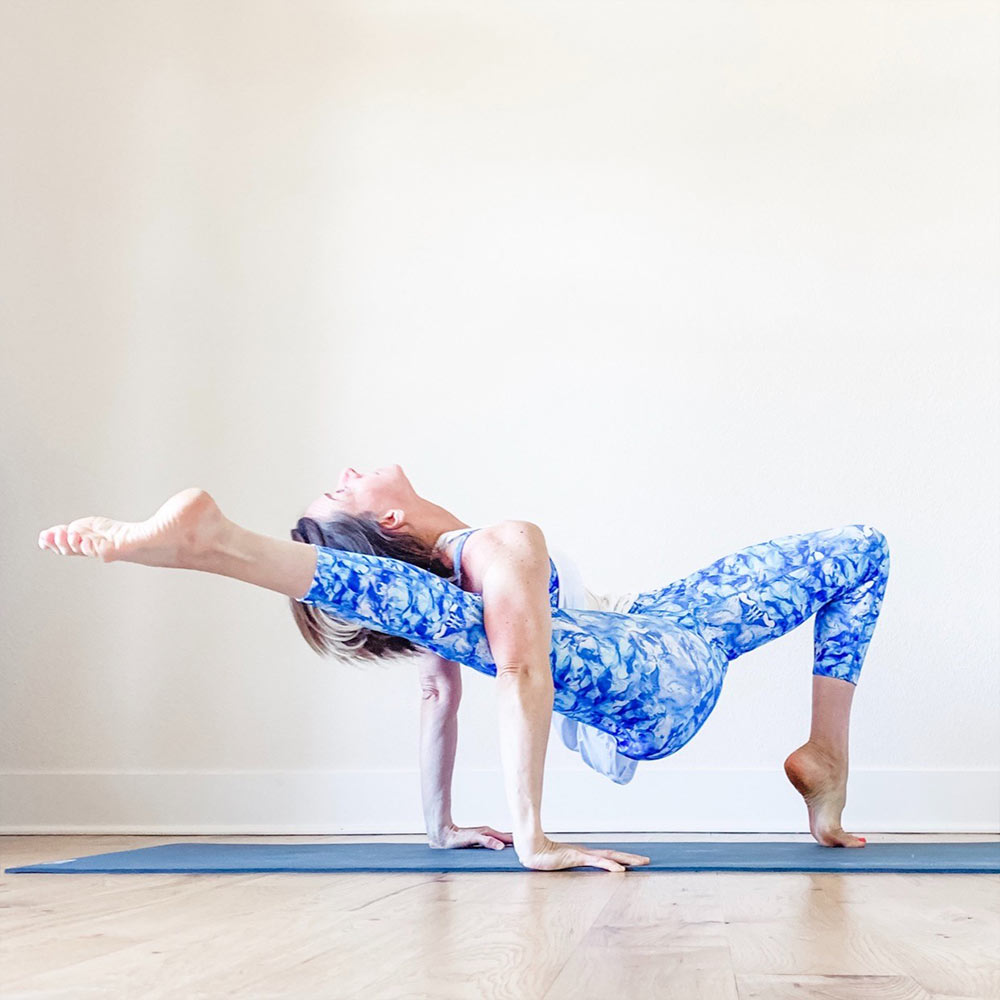
You know those crazy yoga poses that make you say “wow” and scratch your head trying to figure out what is going on?! Well, Shiva Pose will do just that. Shiva Pose is a variation on Kala Bhairavasana (Pose Dedicated to Shiva the Destroyer) and is a progression from Compass Pose. It requires hip, hamstring and shoulder flexibility, arm and core strength, as well as quad strength to keep your top leg straight without the use of your hands while pressing up into a reverse table position.
Make sure to properly warm up before practicing or teaching this pose. Whether you’re a teacher or home practitioner, look at the final pose and break down the components of it to help you create your sequence, i.e. reverse table + compass pose. Think warriors, lizard, forward bends and shoulder stretches. Be efficient in your sequencing by including poses that target more than one body part. A few examples might include: flowing low lunge and 1/2 splits, half or full bound side angle or triangle pose, bound forward folds, forward folds with hands interlaced behind the back, reverse table then swing the hips back through the arms straightening the legs & keeping hips lifted, etc. The more you can help students open and strengthen the appropriate areas of the body, the greater success they will find in this pose.
Below is a sequence to teach as you work your way into Shiva Pose. This would come after your warm up, Surya Namaskars, and 1-2 standing sequences.
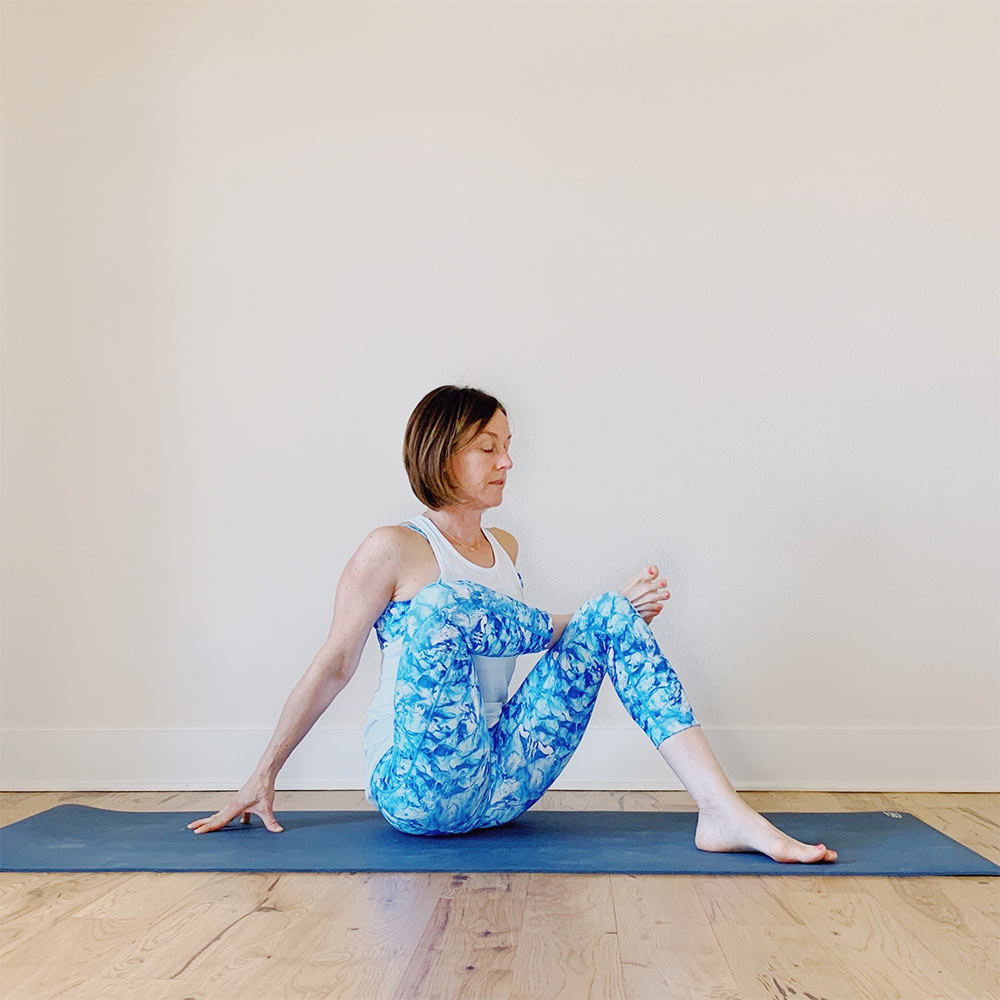
1. Start in a seated figure 4 stretch. The further you walk your foot in, the more intense the stretch will be. Keep a tall spine and lift your chest towards your shin. Keep both hips grounded on the mat. If your hip lifts, back off and walk your foot out a little further.
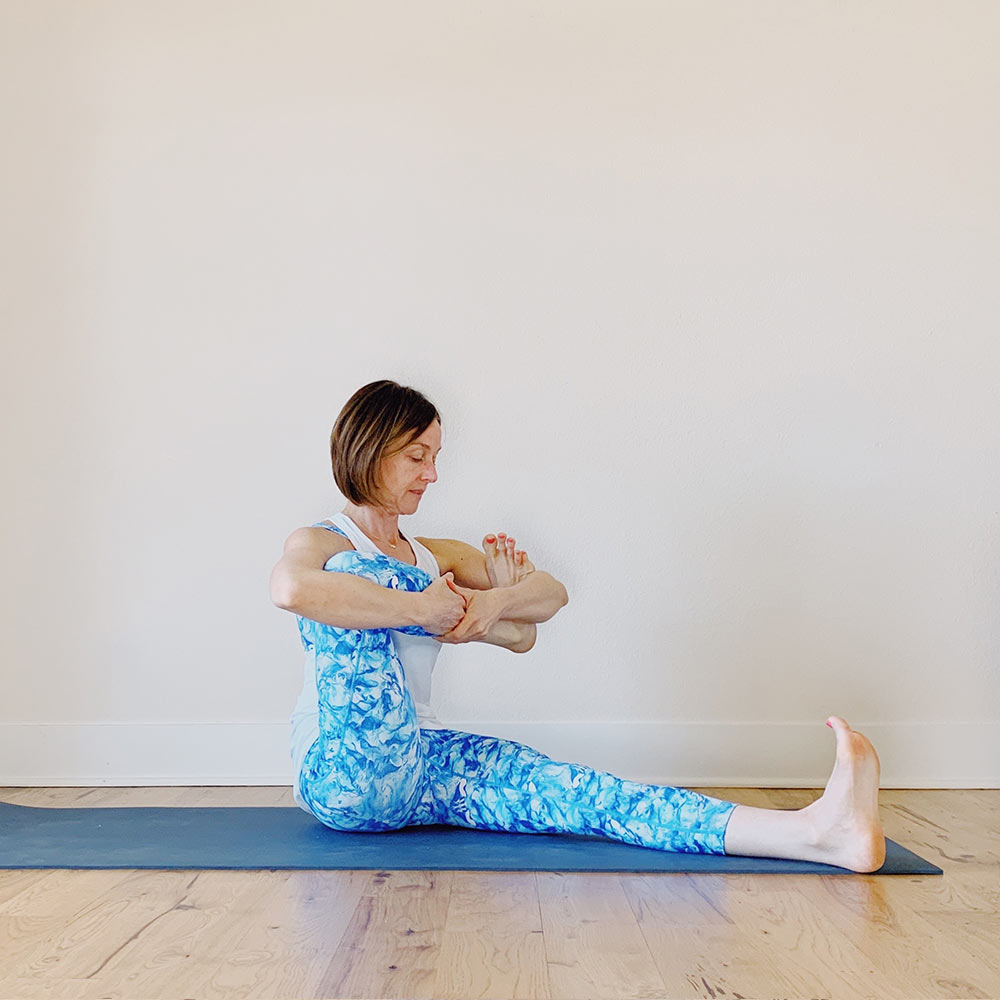
2. Next, cradle your leg. Continue to keep a tall spine and then gently rock your leg back and forth (from right to left) several times easing further into the hip joint.
3. Put your backpack on! Grab a hold of your foot with your opposite hand and work your leg as high up on your arm as you can. Work your shoulder under your calf like you’re putting on a backpack strap. Find some gentle movement here, working the leg back and then up this time.
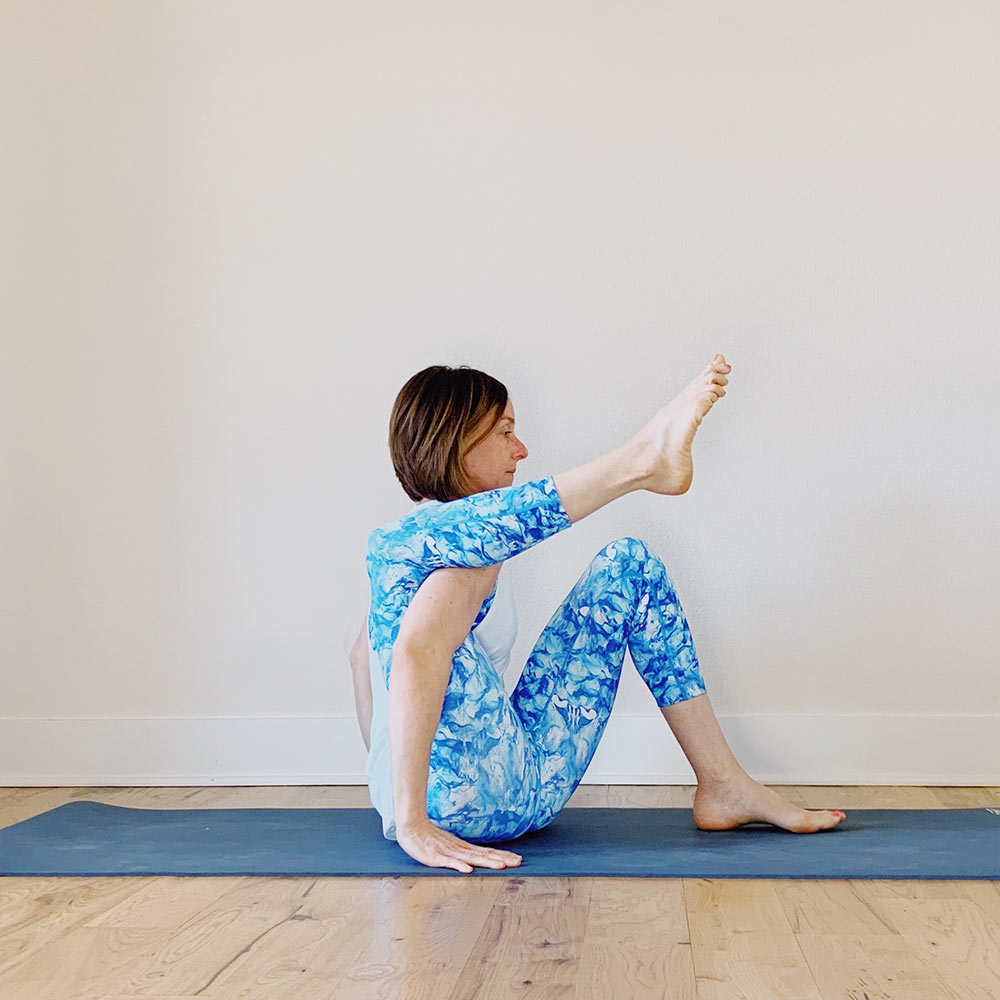
4. Bend your bottom leg in, bringing the sole of your foot to the mat. Plant your hands next to your hips. Squeeze your lifted leg in around your arm and see if you can keep it there without the use of your hands. Straighten your leg before the next step (not pictured). If you cannot hold your leg here without your hands, keep working on this step instead of progressing to the final stage.
5. Shiva Pose. Next, lift and swing your hips forward (think reverse table) as you lean back, coming up onto toes of the bent bottom leg. To straighten your extended leg, engage your quad and reach through your toes. Hold for several breaths and then slowly release your hips back down.
Holly Haas, @yogaandchaigirl
500 RYT
The Barefoot Haven, Studio Owner
If you liked this blog, check out our other blogs like "3 Poses for a Quick Reset", "4 Tips to Find Your Sanctuary in Stressful Times", "Preparation Poses for Forearm Stand," and "Sitting too much? 5 Tips to Get Moving."
